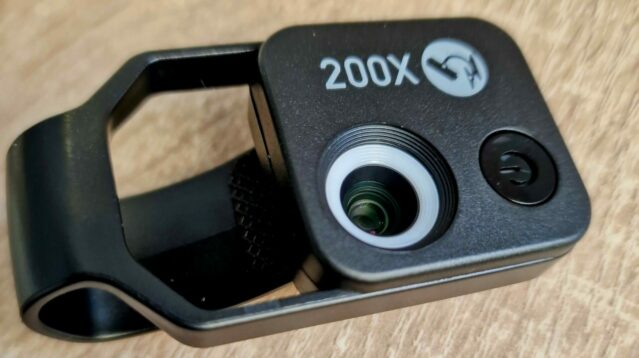
Things far away and things very tiny always interested me. That’s why I got a telescope and a small selection of microscopes ranging from toys to relatively serious lab equipment. Microscopes are fun to play with and a great learning tool for young ones. However, they are somewhat bulky and impractical. Pardon me, Mr. Koch, but it’s true: we’ve made great strides from first microscopes, and bulky and heavy microscopes are not quite fit for today’s kids and their parents (who happen to be kids in their own way).

It is not a simple task to create a microscope one can put in their pocket and still have good magnification and decent picture quality: there are some laws of physics that dictate properties of the light and we can’t simply bend them to our whimsies. A good telescope has to have big lens and/or mirrors, has to be aligned precisely, and the materials have to have superior optic properties. Same goes for microscopes: good lens are a must, as is a good source of light.

However, there’s a twist in the story about microscopes: we’re now capable of producing lenses of significant quality and pretty small scale, and our retinas are replaced by far superior camera sensors that can see sharper and better, even in the dark (given enough time to gather photons). Where we hit the boundaries of physics, we have amazing software to fill in the gaps and take us a notch further.

We already carry them in our pockets, as smartphone cameras have evolved into amazingly capable devices that can easily replace the low- and middle-range cameras; add to that a nice set of lenses that can magnify tiny things, and there you have it – a microscope I could only dream about when I was a kid. Quite literally, what I am going to describe here, from the powerful and tiny computer to superb miniature lens, to amazing colourful display, gigantic pocket-sized storage and powerful applications – all that would be considered a Science Fiction just a few decades ago. Imagine this (if you’re young, if you’re inching to ancience like me, then “remember this”).

But I digress, so let’s get to business. I’ve recently upgraded my gear to Samsung S22 Ultra for its superb camera (and to ditch trusty old Sony camera, but that’s another story), and once I’ve seen Apexel lens on sale, decided to risk the money and see if I could make a decent microscope out of my phone.

I snatched the device for about $25 (about half the retail price), so if you want to give it a try, it’s not going to burn a hole in your pocket.

So, what’s in the package? Apart from less important items like carrying pouch, some cloth for cleaning the lens and USB charging cable, the main thing is a relatively big device; it has a frame that fits well on the phone (the screen facing part has a rubber pad to avoid scratching the screen) with sliding lens holder where lens, LED lights and a battery are set. As the device wants to be as universal as possible, sliding holder will let you align the lens very precisely over your phone’s camera lens. It fits my S22 Ultra very well, in fact I can use it on all four cameras, so it is likely to work on your phone too.

Notice rubber pad on the part that is in contact with the phone’s screen.

The white ring around the lens is an LED array that provides illumination and can be set in two modes: adequately bright illuminaton, and a little bit brighter illumination. I would say that the camera software plays a main role here, because whatever level of illumination you choose, the image is going to be well lit, and a little post-processing can easily reveal even more detail. Lens are polarized to minimize reflections, and that’s quite useful because the light source is so close.

The battery in the device can power LEDs that illuminate objects for a few hours (2-4h, according to the vendor) which should be enough for most needs; it can be charged from any USB source, including the phone if it is capable of charging other devices. The battery is tiny (120mAh); charging directly from the phone will certainly not drain phone’s battery and the device has an USB-C connector.

It is not too difficult to mount the device on the phone, but it does require some force. There are two caveats:

  • if you’re using a case, it might interfere with the positioning of the lens – thick cases will shift the focus away too much, and you might have to remove the case to get proper fit; some cases (rubbery ones) might provide too much friction and make positioning of the lens a bit difficult;
  • the screen facing part of the device could obscure some of the camera controls; luckily, the device allows for different positions so you can try rotating it to, um… obscure another part of the screen, hopefully one that does not have any important controls; whatever you do, keep in mind that small part of the screen will not be accessible.

There’s no special software to be used with this device – just fire up any camera software you fancy, and you’re ready to go! It doesn’t have to be the app provided by the manufacturer; in fact, I’m using a third party app “Open Camera” that is both free of charge and has excellent features, most notably producing crisp images. I find Samsung’s app’s camera AI to be way too obtrusive and trained towards producing “enhanced” selfies for Instagram; true, there’s a pro version that does somewhat better job at reflecting reality, but nevertheless I use the free app because it is fast, good and easy to use.

So, on to first image we go: having just placed the lens on the phone, I reached for the nearest interesting thing: a magazine.

This is how colours are reproduced on paper: combinations of coloured dots; unlike ordered computer screen, positions look random but the spacing is important for our perception of colour saturation.

This… is not impressive. This is quite ordinary, nothing to see here. Yeah, colours are ok, dots are pretty sharp and the overall image quality seem to be fine, but nothing you should write home about. Also, notice that this is not the original quality of the image, as I’ve first uploaded them to Google cloud where they’re converted to more space-saving size, to save both my expenses and your loading time. I find them quite Ok for online publishing: very little of the original detail is lost.

Everybody is using print on paper to show off their camera these days and I am more interested in nature, as this tool is great for field work. So, to grab the nearest piece of nature, I decided to go for my skin. Hairs and their follicles are just next to CMYK blots on paper on the list of most macro-smartphone-photographed things, so there we go: I’m going close up and personal.

Oh! Tiny parasites in my skin! Either that, or delusional parasitosis.

This is rather more remarkable result. That’s my skin from a decent part of my body. In this picture we can see my hair, its follicle and even a tiny blood vessel just beneath the skin. Here, you will notice how the DOF (depth of field, how much of the three-dimensional image is in focus) is pretty shallow, and I’ve missed the skin slightly. This is the main concern of this device, as smartphone cameras tend to have awfully shallow DOF compared with professional cameras, and those lenses narrow it down even more. It is not unlike doing real microscopy because the DOF there is shallow as well, but in this case it feels palpably shallower even than those of mid-range microscopes. On the other hand, all of the pics presented here were done by hand and by using no special equipment to keep things in place, so this is actually pretty good quality!

Next, I wanted to check how the lens work on my other camera lenses, 3x and 10x lenses present on S22 Ultra. Because my default 3rd party application can not recognize those (I hope that author/Samsung will fix that one day), I used default Samsung camera app to snap following two pics.

3x lens

This is quite blurry, but again – keep in mind that I’ve shot this from my hand. I guess that fixating my leg in formalin would make for a more steady shot with better focus, but it is what it is. I like it, it needs work but this mode can be used indeed.

Time for a glorious 10x telephoto lens:

10x lens

I’m quite impressed with this one. What you can’t see in the still image is that the very, very shallow DOF makes having anything in focus very difficult without proper setup. While I was trying to capture this, I’ve noticed that the image does get focused relatively nicely for brief moments, but those will be gone before I could snap a shot. Having a voice command for taking a picture would be very beneficial here, because mere touch of the screen button sends focus flying around in frame. Therefore, this is a somewhat blurry snap that can be improved by not trying to do it from hand; then again, this shows what this combination of smartphone and microscopy lens can achieve. Even this blurry, that image is impressive. Add some contraption to keep everything in place and use a voice command, and you might make an uber-excellent (for the price of this gadget) picture, detailed and clear.

Not all phones have cameras with optical zoom. If your phone is not among them, do not feel sorry: the best results indeed were made with the main camera, and those were taken from the hand. Optical zoom is a nice to have, but not an essential tool.

So, let’s move back to the main camera and try out looking at something we can get steady focus on. The black pouch that comes with the microscope lens is a geometrically interesting example:

Even more interesting is my t-shirt, placed on a desk and not shot on my belly:

t-shirt in royal hue, fit for Constantine and me

This is an awesome photo. You will notice how some parts are out of focus because the phone pressed the fabric and moved it slightly out of the focus. I would never expect those results from, let me remind you, $25 toy.

Here’s some rock with the grains easily distinguishable:

Surface of translucent hard candy:

A leaf with some detritus:

An orchid flower (notice how cells diffuse the pigment):

And then, spring onion leaf, held in place with a finger (you can see the papillary ridges in the background):

Now, prepare to be amazed at this picture of hibiscus pollen, taken by holding the phone against the flower:

The spiky grain of pollen is nicely visible. Let me crop the image to get more into the detail:

This is where I cast doubt at the declared 200x magnification. I’ve seen those grains before, and with a true microscope capable of 200x magnification: there, those grains look significantly bigger. This does not mean that the vendor is a cheater, but keep in mind that the overall magnification is factored by both your phone’s camera and the device. In my case, this looks somewhere between 150x and 200x, but not quite like full 200x magnification. Still freakin’ impressive, though.

We should not forget that the phone is capable of doing more than still images, it does video, too! And there’s absolutely nothing that could prevent us from taking a microscope video! Here’s my attempt of making a video of some other plant, outside, while it’s raining and slightly windy; you will again see how shallow the DOF is.

If you have some laboratory equipment to prepare slides, it is easy to imagine many creative things one could make with this toy: a video of tiny creatures living in a drop of swamp water, slow motion video of something microscopically interesting happening very quickly, or a time-lapse of a sprouting seed or growing bacterial colony… or a puzzle solving mould.

To finish this review, I’ve been hinted to use the well-known onion peel example. However, I could not find proper glass to make a slide, so I resorted to using a petri dish. Here are examples of my sorry attempt at staining the onion peel:

Using Open Camera

Using Samsung Camera app

Samsung camera, 3x optical zoom

Samsung camera, 10x optical zoom

Another shot with Open Camera, nearly lossless compression

I can say that I’m truly impressed with this little toy: while the laws of physics still apply (and you can see them at work on 10x optical zoom), you can expect great results if you use this device on a phone with a decent camera. Doesn’t have to be the crazy expensive one like some people buy to show-off (ehem…), but it has to be at least somewhere in the middle range. The device alone will not save you, you can’t make great pics with a cheap smartphone camera, so if you want to make photos like these, you need to have a good quality camera in your phone.

I don’t have many objections to this gadget: the FOV is shallow, but then again it is to be expected, and the proclaimed 200x magnification seem somewhat overblown to me (and it might vary from one smartphone model to another).

If you can get over those issues, I would highly recommend getting this gadget, especially if you can get it on discount. It is sturdy, comes with its own light source and is relatively easy to mount. Thanks to his movable body it is compatible with many different smartphones.

I wouldn’t recommend it for professional work, just like I wouldn’t recommend any smartphone camera to a professional photographer. I would, however, recommend it to everyone else, whether you want to play with it, have your kids play with it, or show your students some tricks.

It might be helpful in some real field work if you can live with the limitations, and it certainly can replace cheap microscopes in school labs: you can hand out devices to students and let them take a picture of a slide or specimen, mark whatever they have to mark on the photo they’ve made, include it in the paper they’re writing and e-mail it to the teacher or upload to a designated storage – all of that using just one device. It’s the 21st century school microscopy: cheap, good quality, versatile and built for digital tools.

If you’re eager to buy one for yourself, here’s the link to the vendor I bought mine – here. Note: author is not in any way affiliated with the vendor.

There are other models from other vendors and they look quite generic, so you don’t need to buy from that particular shop. There’s one thing to keep in mind while shopping for neat little microscope lens: be vary of magnification. Bigger magnification does not mean better quality – remember the laws of physics and how they work against small and cheap optical elements. Even the magnification this device boasts (200x) is a little bit suspicious, so be extra careful while looking at devices promising 400x, 800x, 1000x… magnification, as you’ll be hitting physics hard with these big numbers.

Update: I’ve managed to find a drowning mosquito, so here are some more examples. First, the mosquito, taken with Open Camera. First one is a default picture, the other is lightly touched upon by Google Photos .

original photo
improved version, done by selecting auto enhance

This one has been taken with Samsung camera app and 3x optical zoom lens:

a wet little mosquito

Finally, these two demonstrate the focal length (or, rahter, shallowness) – two images, one of the damn mould in my terrarium, the other of its fruiting body:

Update 2: here are some more pics (and a video!) taken with the same setup:

ant abdomen
wasp stinger
wasp head and thorax
wasp abdomen and stinger, using 3x optical lens
video of wasp’s nasty end; notice the shallow DOF

Visits: 2481